Hugo 添加 Giscus 评论
目录
捣鼓了这么多天,看见别人的博客都有评论功能,十分羡慕,所以我在想有什么轻量又简单的方法,能让我的博客也能有评论功能,而这时我找到了 Giscus。
Giscus 是一个由 Github Discussions 驱动的评论系统,无需自己单独配置,直接白嫖 Github 的资源即可,而且 UI 和功能都十分的合适我,配合 LoveIt 的配置可以做到十分美观。
配置 Github 仓库
-
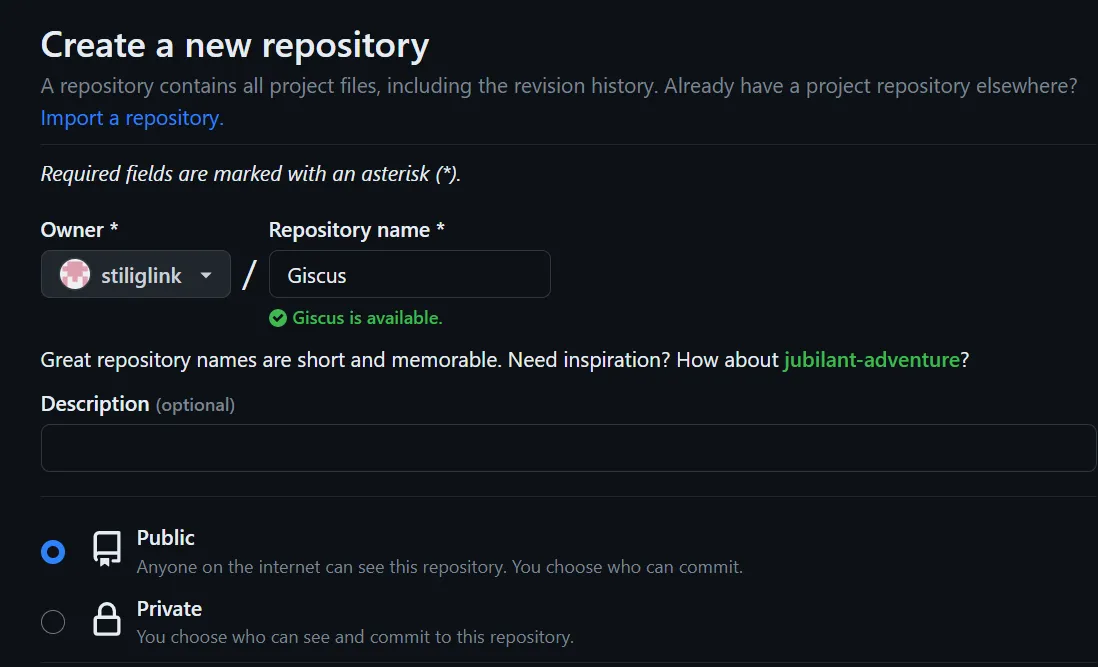
如下图,创建一个公开的 Github 仓库
-
找到
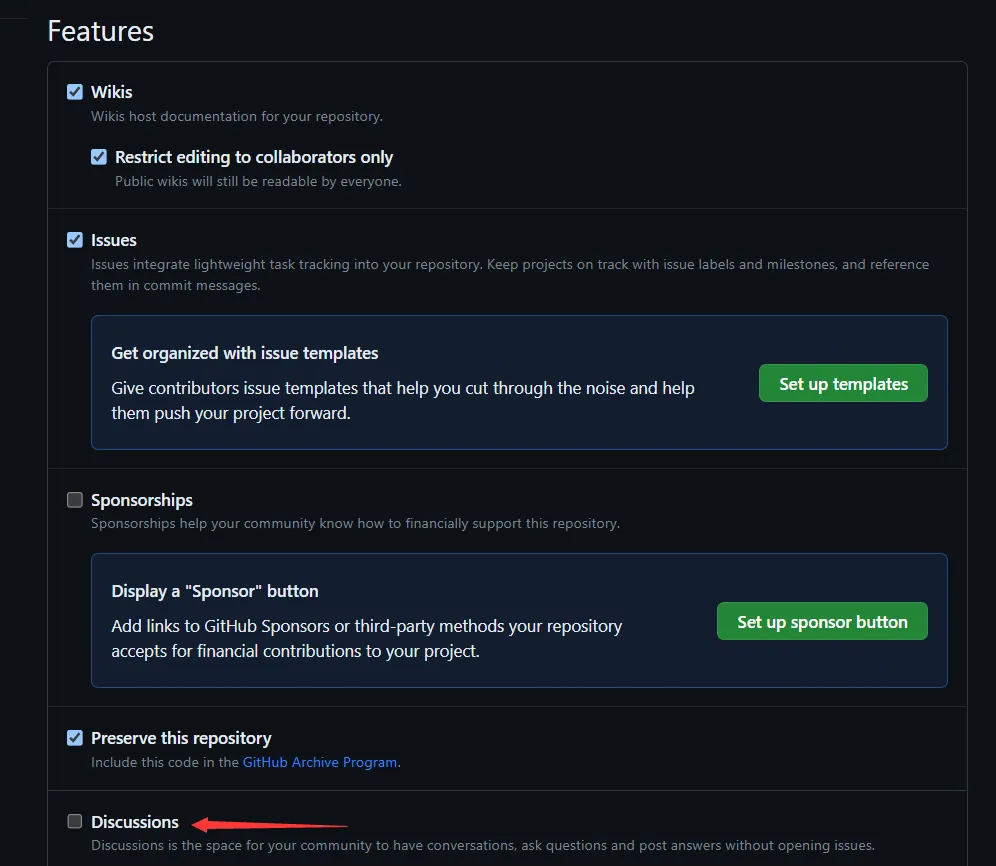
Settings -> General -> Features -> Discussions勾选,为仓库启动Discussions功能 ,如下图
使配置好的仓库安装 Giscus
-
点击这里,我们将会看到下面的界面,我们点击安装
-
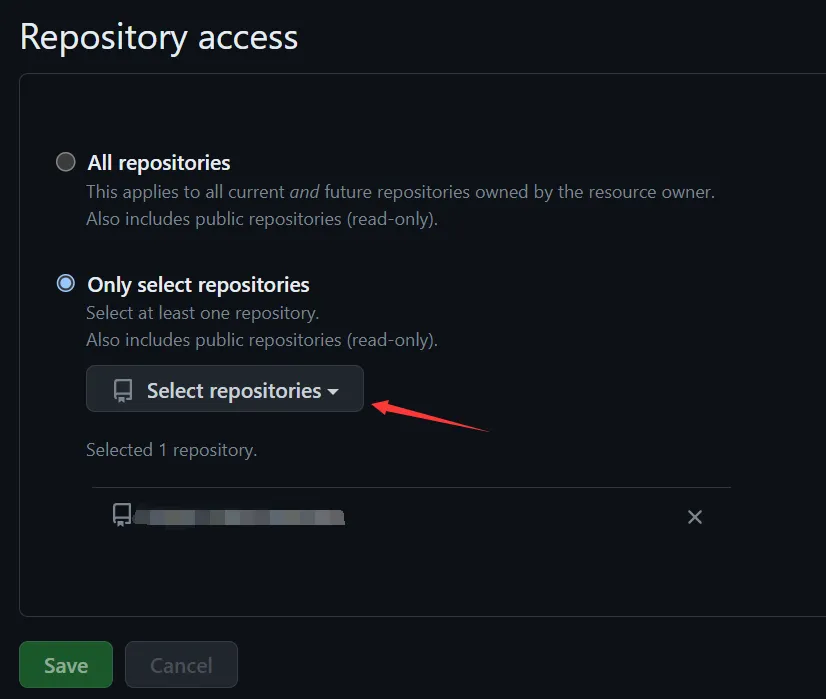
点击安装后,要选择一个仓库,如下图,选择我们之前创造的仓库即可
我遇到的问题我创了个新号打算试试,但是发现点击安装后直接 404 ,估计是对新创的号有限制吧。
从官网获取配置信息
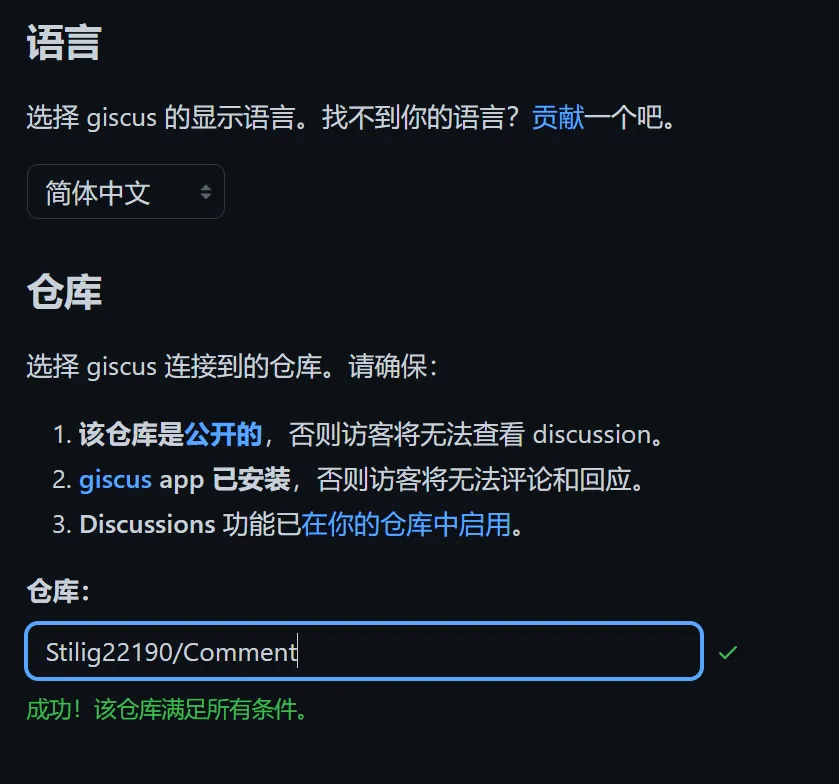
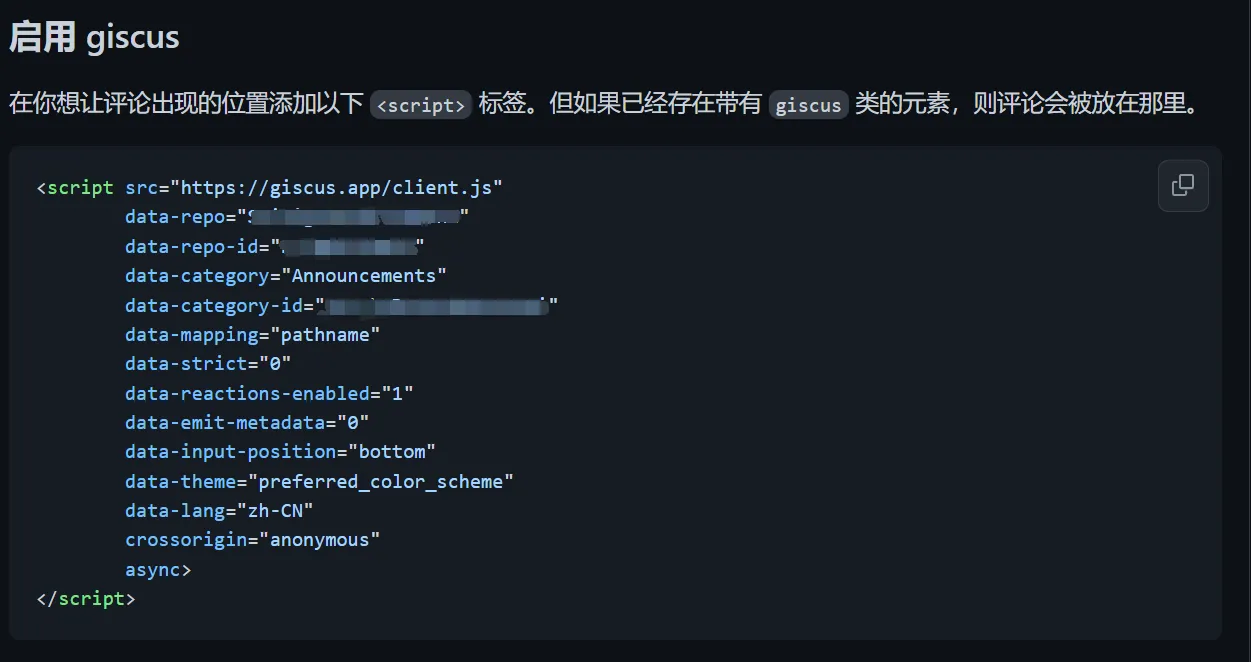
接下来,我们只需到 Giscus 官网获取配置信息,然后将配置信息填到 Hugo 的配置文件中即可。但是由于主题的不同,所以配置文件的填写也不同,这里以 LoveIt 为例。
- 来到 Giscus 官网
- 修改 Hugo 配置文件
注意这里使用的 Hugo 一定要是最新的版本,不然是不支持 Giscus 的(比如
release的版本就是不支持的,因此要下载源码)。-
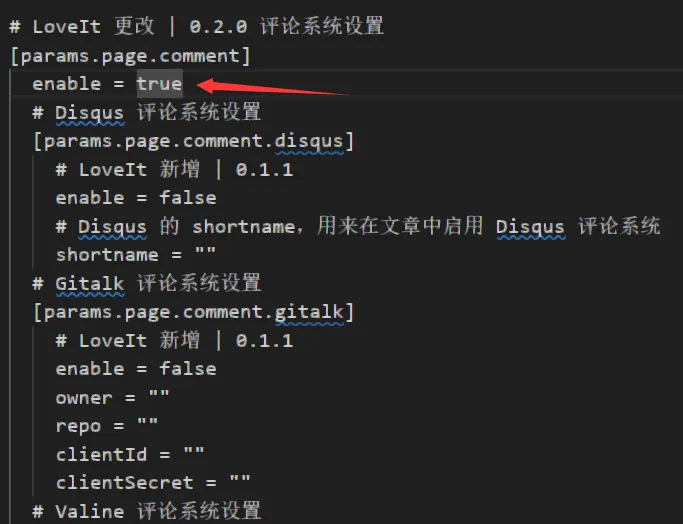
打开配置文件
config.toml,找到# 评论系统设置的第一个 enable 参量,将其改为 true,如下图: -
找到
# giscus comment 评论系统设置,并把其配置按照下面代码块修改。1 2 3 4 5 6 7 8 9 10 11 12 13 14 15 16 17 18 19 20 21 22[params.page.comment.giscus] # 你可以参考官方文档来使用下列配置 enable = true repo = "<your_repo>" repoId = "<your_repoId>" category = "<your_category>" categoryId = "<your_categoryId>" # <your_repo> 对应官网的 data-repo # <your_repoId> 对应官网的 data-repo-id # <your_category> 对应官网的 data-category # <your_categoryId> 对应官网的 data-category-id # 为空时自动适配当前主题 i18n 配置 lang = "" mapping = "<your_mapping>" # <your_mapping> 对应官网的 data-mapping reactionsEnabled = "1" emitMetadata = "0" inputPosition = "bottom" lazyLoading = false lightTheme = "light" darkTheme = "dark_dimmed"配置好后,就可以开启 Giscus 评论系统了。
-
参考文章:
警告
本文最后更新于 June 19, 2023,若内容或图片失效,请留言反馈。部分素材来自网络,若不小心影响到您的利益,请联系删除。
 Stilig